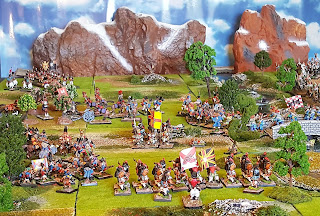
Having convened a Council of War, General Gordon was left the unenviable task of choosing the best of several bad options.
This post follows Crossing Point - 12:00 Gordon Calls a Council of War , which has now been updated with many photos. If you like pictures of tabletop black powder battles have another go at that post.
This post also concludes this series.
Above: the white slips of paper are new orders on their way to battalion commanders.
First a disclosure. This game is meant to be the first in a narrative campaign that may spread to cover all of post-human Middle Earth. With that in mind, Gordon opted to sound retreat and preserve his forces to fight another day.
The reason I convened the Council, but suppressed that information, is that as Gordon's opponent I wanted to see if I was throwing in his towel too soon.
Responses to the call for advice were fairly evenly split between retreat and an aggressive stab at the bridge.
In a non-campaign environment, where each battle stands in isolation there would be no need to conserve forces. In a two or more player game, taking the more "historical" choice of preserving the losing force, both prevents a player from "lucking" his way to unlikely victory (which makes a great story), and, worse yet, ends the game!
However I was particularly taken with a plan offered up by Crazyivonaov on The Miniatures Page.
Well the figures were in place, as Sault I had decided not to risk my cavalry in the pursuit of a fairly well off enemy, and there was more fun to be had so...
...In the spirit of multiverses and all of that, Gordon had a go, although the result does not apply in this reality.
The Plan
Forgive my odd arrows, hope readers can follow!
"There is one chance to salvage this battle and that is it. Killmores should move for the bridge, possibly form square to ensure no sneaky moves by unseen enemy skirmishers( risky under cannonade, but possibly necassary with so large an enemy force on this side of the river).
1Goblinado must pin 1 Diberian, and 2Goblinado take them in the flank and try to sweep across the line of Red Cavalry.
Eye's'N'Gourd Foot has to try and hold out against the Red Cavalry, if Goblinado can route Diberian and begin to fire on the horse, they can advance and take the bank. They can rake the flanks of advancing enemies with fire until they hit the bridge and force the enemy cannon to make hard decisions.
From then just hold the bridge and bank until night fall."
- Colonel Crazyivanov, DSO, OBE, AdC to General Gordon
It sounds a, err, sound plan for a last stand that just might work.
Unfortunately it fell apart almost from the start.
Even before the Eye's N' Gourds could receive their new orders tragedy struck.
In close column they continued their advance towards the bridge. A lucky shot from the 66th Legre killed the Colonel! It little mattered that their return fire rendered the 66th no longer combat worthy because...
Nearly simultaneously the Coltzen Lancers charged.
The Eyes' N' Gourds had time to form square, not difficult from a closed column after all, but here luck deserted them.
The square was broken and overrun without significant loss to the centaurs! A very unlikely outcome but one that has occasionally cropped up on historical battlefields.
Elsewhere the plan met with more success.
The Killmores were able to advance while firing by platoons and take station blocking the bridge...
...although not before the Cuirassiers had already crossed, perhaps literally "slamming the barn door after the horse had escaped".
Still the Killmores delivered a punishing fire on the 1st Diberian.
1/Gobilinado also exchanged fire with 1st Diberian.
Soon 1/Diberian was a shell of its former self. Still the goblins had also lost heavily and 1/23rd Ligne although weakened, was well positioned to plug any gap that might appear in the Imperial line.
2/Diberian made a game attempt at forcing the crossing in the face of the Killmore's fire.
Had that been the only threat the Killmore's may well have held.
However, now subject to the concerted fire of the elven/werewolf guns, the Killmores could not stand.
Here's a shot of the Imperial bag; five gunners, one light dragoon, and six Eyes'N'Gourds...
...and worst of all, their colours!
The Allied line was now in complete disarray.
Even the arrival of the Glasgeegian Regiment of Foote offered no succor as no sooner had they deployed into line then...
They were taken in the flank by a massive elven cavalry charge.
At this point I called it a day.
Imagine the unbearably smug attitude of Symmerson had this played out in reality? No doubt a letter writing campaign demanding the removal of Wheelingturn from over all command in Lothlorian with Symmerson himself suggested as the "natural" choice for the Duke's replacement.
As for my generalship on behalf of Marshal Sault, should I have pursued more vigorously? Imagine the Glory had the Eyes'N'Gourds fallen into the bag. It might even have offset the loss of the 1/12th's Eagle.
Will his Excellency the Emperor Rospolian Buffonaparte of Le Foret Noire be pleased with my incomplete victory? Surely even with the loss of their Eagle, the 1/12 covered themselves in Glory! But the Emperor must be the final judge of that...
Hope you have enjoyed this as much as I have and my compliments to all those who stepped up and offered counsel to General Gordon!
Until next time, thanks for stopping by!


